Views: 28 Author: Site Editor Publish Time: 2024-01-18 Origin: Site


![]()
A Comprehensive Walkthrough: Installing Water-Resistant Laminate Flooring by Anyway Flooring
Are you gearing up for a kitchen remodel and contemplating the installation of water-resistant laminate flooring? Look no further! This detailed guide will take y
ou through each step of the process, utilizing the exquisite Anyway Flooring. By following these comprehensive instructions, you'll not only achieve a visually stunning result but also ensure the functionality and longevity of your flooring. Let's dive into this extensive DIY guide, tailored for success.
![]()
Pre-Installation Preparations
Before embarking on the installation journey, it is essential to meticulously prepare your space to ensure a seamless and long-lasting result. The following pre-installation preparations are crucial for achieving optimal performance from your new Anyway Flooring laminate:
Acclimating Your Anyway Flooring
The initial and fundamental step in the pre-installation process is allowing your chosen Anyway Flooring laminate to acclimate to the environment in which it will be installed. This step is not to be rushed; allocate a minimum of 48 hours for this crucial acclimatization process. By doing so, you enable the flooring to adjust to the temperature and humidity of your home. This thoughtful measure significantly reduces the risk of potential issues such as warping or damage post-installation. Patience in this phase ensures a solid foundation for a flawless flooring experience.
Removing Old Flooring
Prepare a pristine canvas for your new flooring by bidding farewell to the old. Begin by methodically removing the existing flooring material, leaving no remnants behind. To address any imperfections on the subfloor, employ a high-quality flooring patching product. This not only fills gouges but also creates a level and stable surface for the new laminate. Follow up this patching process with a meticulous sanding session using a random orbital sander. The goal here is to achieve a smooth texture that complements the flawless aesthetics of your new flooring. A thorough vacuuming session comes next, ensuring the elimination of any lingering debris and guaranteeing a clean slate for the installation process.
Installing Underlayment
The choice of underlayment plays a pivotal role in the performance of your laminate flooring. Opt for a reliable underlayment that serves the dual purpose of providing sound insulation and moisture protection. Pay close attention to the features, ensuring the presence of a sticky adhesive strip. This design simplifies the connection between underlayment pieces, eliminating the need for additional tape and streamlining the installation process. The underlayment acts as a silent supporter, enhancing the comfort and durability of your new flooring. By investing time and effort in selecting and installing the right underlayment, you set the stage for a flooring masterpiece that stands the test of time.
Planning and Layout
The success of your laminate flooring installation hinges on a meticulously crafted plan. Thoughtful consideration of the following key aspects during the planning and layout stage ensures not only a smooth installation process but also a visually stunning and cohesive end result.
Trim Work and Door Thresholds
Begin by assessing the existing trim work and door thresholds in the space where you plan to install the laminate flooring. It's imperative that the new flooring seamlessly integrates with the trim work and does not exceed the height of door thresholds. In cases where adjustments are necessary, employ precision tools like an oscillating multitool to trim doors for a flawless fit. This attention to detail guarantees a polished and professional appearance, where the flooring harmoniously complements the existing architectural elements.
Drawing Out the Layout
Before diving into the installation process, take the time to create a detailed layout of the room. Consider the width of the laminate planks and meticulously measure the dimensions of the space. This planning stage is crucial in preventing awkward placements, ensuring that the flooring flows seamlessly from one area to another. By visualizing and mapping out the layout in advance, you can strategically plan the positioning of planks, minimizing waste and optimizing the use of materials. The result is a flooring design that not only fits the physical space but also creates a sense of unity and balance.
Cutting Planks for Precision
Equipping yourself with the right tools is paramount for achieving precision during the installation. Utilize tools such as a tapping block, mallet, and a black bar specifically designed for flooring installation. Plan your cuts meticulously, considering the layout you've designed, and stagger the seams strategically. Staggering the seams not only adds to the structural integrity of the flooring but also contributes to a natural and aesthetically pleasing appearance. This meticulous approach to cutting and placing planks ensures that the installation reflects a high level of craftsmanship and attention to detail, elevating the overall aesthetic of the space.
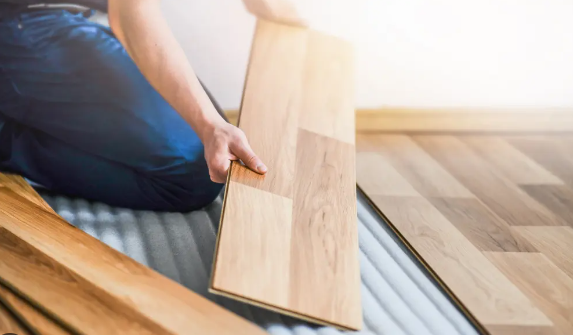
Installing the Laminate Planks
With the groundwork laid through pre-installation preparations and meticulous planning, it's time to transition from concept to reality by laying down the waterproof laminate flooring. Follow these detailed steps for a flawless installation:
Starting with Challenging Areas
Embark on the installation journey by addressing the challenging areas first, particularly those around doors. This strategic starting point sets the tone for the entire installation process. Employ precision techniques, using tools like an oscillating multitool if necessary, to ensure a seamless fit. Integrate blue spacers against walls to allow for the natural expansion and contraction of the laminate flooring. This thoughtful addition not only facilitates the installation process but also safeguards against potential issues arising from temperature and humidity fluctuations.
Seams and Spacers
As you lay down the laminate planks, pay close attention to the placement of seams. Stagger them strategically to create a natural and visually appealing flow. Additionally, use spacers along all edges to maintain a consistent 3/8" to 1/2" gap around the perimeter. This gap is essential for accommodating the natural movement of the flooring and preventing buckling or warping. Consistently employ a tapping block during the installation process to ensure a secure connection between each plank. This meticulous attention to detail contributes not only to the structural integrity of the flooring but also to its polished and professional appearance.
Precision Cuts
When reaching the end of a row, precision becomes paramount. Consider flipping the laminate plank backward for more accurate measurements and cuts. This technique minimizes errors and ensures a snug fit. Utilize specialized tools such as a jigsaw or miter saw for precision cuts, eliminating the need for a tape measure. This method not only streamlines the installation process but also enhances the overall accuracy and quality of the flooring project.
Installation Tips and Tricks
Maximize the efficiency of your laminate flooring installation by incorporating these valuable tips and tricks:
Cabinetry Considerations
When installing laminate flooring, exercise caution around cabinetry. To maintain standard counter height and prevent potential issues like buckling, avoid running the flooring beneath cabinetry. This strategic decision not only ensures a clean and professional appearance but also contributes to the long-term stability of your laminate flooring. By leaving an expansion gap around cabinetry, you allow the flooring the flexibility it needs to adapt to environmental changes without compromising its structural integrity.
Spacers Technique
Optimize the use of spacers by employing a sandwiching technique. Place spacers along the edges of the laminate planks in such a way that they can be easily removed after the floor has been laid. This small yet effective trick streamlines the installation process, making it more efficient and ensuring a uniform and aesthetically pleasing result.
Waterproofing Assurance
To fortify the waterproofing capabilities of your laminate flooring, pay special attention to sealing the edges beneath baseboards. Employ a combination of foam backer rod and 100% silicone for a reliable and long-lasting waterproofing solution. This meticulous sealing process acts as an additional layer of protection against moisture infiltration, safeguarding the integrity of your laminate flooring over time. By prioritizing waterproofing assurance, you enhance the durability and resilience of your flooring, making it a wise investment for the years to come.
Finishing Touches
As you near the completion of your laminate flooring installation, it's time to add those finishing touches that elevate the overall aesthetic and ensure a seamless integration within your space. Begin by replacing baseboards, offering a clean transition between the flooring and the walls. This step not only conceals any expansion gaps but also contributes to a polished and cohesive appearance. Additionally, install toe kicks beneath cabinets for a unified and harmonious look, showcasing your commitment to detail and precision throughout the installation process. These finishing touches serve as the crowning elements, accentuating the beauty of your new waterproof laminate flooring.
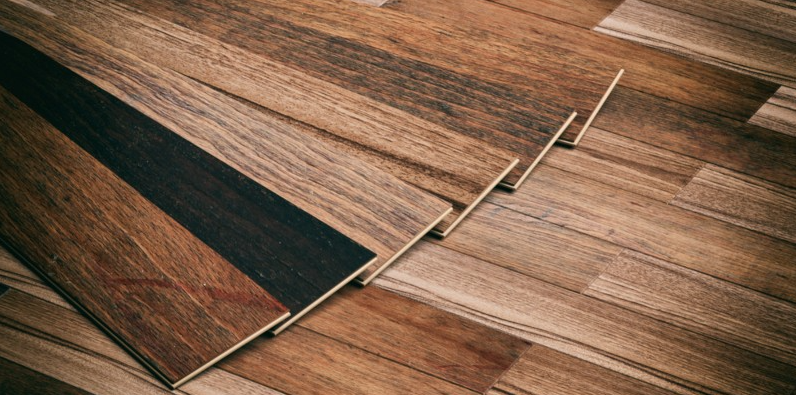
Embracing Anyway Flooring
Beyond its exceptional functionality, Anyway Flooring stands as a testament to refined elegance within your living space. The choice to embrace Anyway Flooring goes beyond practicality, offering top-quality products that not only enhance the durability of your home but also elevate its aesthetic appeal. With a diverse range of designs and textures, Anyway Flooring provides a canvas for expressing your unique style and transforming your space into a showcase of sophistication.
In Conclusion
In conclusion, this comprehensive guide equips you with the knowledge and confidence to navigate the installation of water-resistant laminate flooring seamlessly. Trust Anyway Flooring as your partner in this journey, providing a premium flooring solution that seamlessly combines aesthetics and functionality. Elevate your living space by investing in the exceptional floors offered by Anyway Flooring, where every step is a testament to quality, precision, and enduring beauty.